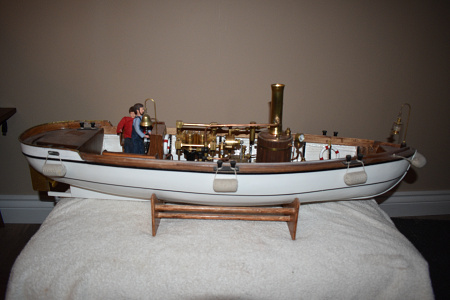
Thanks to Chris F he sent the plans for the Fairey Huntsman. Went to a drafting photo shop had them enlarge the plan to build a 24" boat. Got a start for this project by getting the hull framed in. As this will be a first at skinning a hull with sheet pieces . Research goes on for the best way to start and how to skin the bow.
Rick
[{"id":"163985393295","name":"163985393295.jpg","caption":"","url":"https:\/\/it.model-boats.com\/media\/163985393295\/l","thumbUrl":"https:\/\/it.model-boats.com\/media\/163985393295\/s","isImage":true,"ext":"jpg"},{"id":"163985401851","name":"163985401851.jpg","caption":"","url":"https:\/\/it.model-boats.com\/media\/163985401851\/l","thumbUrl":"https:\/\/it.model-boats.com\/media\/163985401851\/s","isImage":true,"ext":"jpg"},{"id":"163985412048","name":"163985412048.jpg","caption":"","url":"https:\/\/it.model-boats.com\/media\/163985412048\/l","thumbUrl":"https:\/\/it.model-boats.com\/media\/163985412048\/s","isImage":true,"ext":"jpg"},{"id":"163985418874","name":"163985418874.jpg","caption":"","url":"https:\/\/it.model-boats.com\/media\/163985418874\/l","thumbUrl":"https:\/\/it.model-boats.com\/media\/163985418874\/s","isImage":true,"ext":"jpg"},{"id":"163985422494","name":"163985422494.jpg","caption":"","url":"https:\/\/it.model-boats.com\/media\/163985422494\/l","thumbUrl":"https:\/\/it.model-boats.com\/media\/163985422494\/s","isImage":true,"ext":"jpg"}]
Thanks to Chris F he sent the plans for the Fairey Huntsman. Went to a drafting photo shop had them enlarge the plan to build a 24" boat. Got a start for this project by getting the hull framed in. As this will be a first at skinning a hull with sheet pieces . Research goes on for the best way to start and how to skin the bow.
Rick
Had pieces of 1/32" ply to do the support deck. Built up the bow with strips to take the curves of the the frame. The ply pieces were small leftover and not a full sheet so will piece together to do the deck. Will be planking the deck.
Rick
[{"id":"163996737389","name":"163996737389.jpg","caption":"","url":"https:\/\/it.model-boats.com\/media\/163996737389\/l","thumbUrl":"https:\/\/it.model-boats.com\/media\/163996737389\/s","isImage":true,"ext":"jpg"},{"id":"163996742615","name":"163996742615.jpg","caption":"","url":"https:\/\/it.model-boats.com\/media\/163996742615\/l","thumbUrl":"https:\/\/it.model-boats.com\/media\/163996742615\/s","isImage":true,"ext":"jpg"},{"id":"163996746870","name":"163996746870.jpg","caption":"","url":"https:\/\/it.model-boats.com\/media\/163996746870\/l","thumbUrl":"https:\/\/it.model-boats.com\/media\/163996746870\/s","isImage":true,"ext":"jpg"},{"id":"163996751796","name":"163996751796.jpg","caption":"","url":"https:\/\/it.model-boats.com\/media\/163996751796\/l","thumbUrl":"https:\/\/it.model-boats.com\/media\/163996751796\/s","isImage":true,"ext":"jpg"},{"id":"163996764461","name":"163996764461.jpg","caption":"","url":"https:\/\/it.model-boats.com\/media\/163996764461\/l","thumbUrl":"https:\/\/it.model-boats.com\/media\/163996764461\/s","isImage":true,"ext":"jpg"}]
Had pieces of 1/32" ply to do the support deck. Built up the bow with strips to take the curves of the the frame. The ply pieces were small leftover and not a full sheet so will piece together to do the deck. Will be planking the deck.
Rick
Able to get sides skinned two sides from keel up. Need to find pieces to do the upper sections. Made the wind shield still needs fine tuning.
Rick
[{"id":"164013994653","name":"164013994653.jpg","caption":"","url":"https:\/\/it.model-boats.com\/media\/164013994653\/l","thumbUrl":"https:\/\/it.model-boats.com\/media\/164013994653\/s","isImage":true,"ext":"jpg"},{"id":"164013996366","name":"164013996366.jpg","caption":"","url":"https:\/\/it.model-boats.com\/media\/164013996366\/l","thumbUrl":"https:\/\/it.model-boats.com\/media\/164013996366\/s","isImage":true,"ext":"jpg"},{"id":"164013998742","name":"164013998742.jpg","caption":"","url":"https:\/\/it.model-boats.com\/media\/164013998742\/l","thumbUrl":"https:\/\/it.model-boats.com\/media\/164013998742\/s","isImage":true,"ext":"jpg"}]
Sanded down the sides to shape fine tuning when all the pieces are in place. Received the power unit and started to put in place. Made a wood plate to attach inside the stern to mount the power unit into .
Rick
[{"id":"164019686075","name":"164019686075.jpg","caption":"","url":"https:\/\/it.model-boats.com\/media\/164019686075\/l","thumbUrl":"https:\/\/it.model-boats.com\/media\/164019686075\/s","isImage":true,"ext":"jpg"},{"id":"164019688391","name":"164019688391.jpg","caption":"","url":"https:\/\/it.model-boats.com\/media\/164019688391\/l","thumbUrl":"https:\/\/it.model-boats.com\/media\/164019688391\/s","isImage":true,"ext":"jpg"},{"id":"164019690365","name":"164019690365.jpg","caption":"","url":"https:\/\/it.model-boats.com\/media\/164019690365\/l","thumbUrl":"https:\/\/it.model-boats.com\/media\/164019690365\/s","isImage":true,"ext":"jpg"},{"id":"164019692187","name":"164019692187.jpg","caption":"","url":"https:\/\/it.model-boats.com\/media\/164019692187\/l","thumbUrl":"https:\/\/it.model-boats.com\/media\/164019692187\/s","isImage":true,"ext":"jpg"},{"id":"164019694157","name":"164019694157.jpg","caption":"","url":"https:\/\/it.model-boats.com\/media\/164019694157\/l","thumbUrl":"https:\/\/it.model-boats.com\/media\/164019694157\/s","isImage":true,"ext":"jpg"}]
Sanded down the sides to shape fine tuning when all the pieces are in place. Received the power unit and started to put in place. Made a wood plate to attach inside the stern to mount the power unit into .
Rick
Side view of the power unit.
Rick
[{"id":"164022346841","name":"164022346841.jpg","caption":"","url":"https:\/\/it.model-boats.com\/media\/164022346841\/l","thumbUrl":"https:\/\/it.model-boats.com\/media\/164022346841\/s","isImage":true,"ext":"jpg"},{"id":"164022352371","name":"164022352371.jpg","caption":"","url":"https:\/\/it.model-boats.com\/media\/164022352371\/l","thumbUrl":"https:\/\/it.model-boats.com\/media\/164022352371\/s","isImage":true,"ext":"jpg"}]
All sides now on the boat ready for sanding and filling if needed. My first time doing a boat this way. Pleasing to see the progress in such a quick manner.
Rick
[{"id":"164029349210","name":"164029349210.jpg","caption":"","url":"https:\/\/it.model-boats.com\/media\/164029349210\/l","thumbUrl":"https:\/\/it.model-boats.com\/media\/164029349210\/s","isImage":true,"ext":"jpg"},{"id":"164029350762","name":"164029350762.jpg","caption":"","url":"https:\/\/it.model-boats.com\/media\/164029350762\/l","thumbUrl":"https:\/\/it.model-boats.com\/media\/164029350762\/s","isImage":true,"ext":"jpg"},{"id":"164029352243","name":"164029352243.jpg","caption":"","url":"https:\/\/it.model-boats.com\/media\/164029352243\/l","thumbUrl":"https:\/\/it.model-boats.com\/media\/164029352243\/s","isImage":true,"ext":"jpg"},{"id":"164029353896","name":"164029353896.jpg","caption":"","url":"https:\/\/it.model-boats.com\/media\/164029353896\/l","thumbUrl":"https:\/\/it.model-boats.com\/media\/164029353896\/s","isImage":true,"ext":"jpg"}]
All sides now on the boat ready for sanding and filling if needed. My first time doing a boat this way. Pleasing to see the progress in such a quick manner.
Rick
Sides now complete and cleaned up sanded down minor filling in spots. Two coats of Eze- Kote sanded in-between each. more coats yet. This build so far has been the least expensive as most of the wood was on hand from other projects.
Rick
[{"id":"164036425678","name":"164036425678.jpg","caption":"","url":"https:\/\/it.model-boats.com\/media\/164036425678\/l","thumbUrl":"https:\/\/it.model-boats.com\/media\/164036425678\/s","isImage":true,"ext":"jpg"},{"id":"164036450139","name":"164036450139.jpg","caption":"","url":"https:\/\/it.model-boats.com\/media\/164036450139\/l","thumbUrl":"https:\/\/it.model-boats.com\/media\/164036450139\/s","isImage":true,"ext":"jpg"}]
Sides now complete and cleaned up sanded down minor filling in spots. Two coats of Eze- Kote sanded in-between each. more coats yet. This build so far has been the least expensive as most of the wood was on hand from other projects.
Rick
Designed a simple stand for the boat and glued the lower support deck in place.
Rick
[{"id":"164063684597","name":"164063684597.jpg","caption":"","url":"https:\/\/it.model-boats.com\/media\/164063684597\/l","thumbUrl":"https:\/\/it.model-boats.com\/media\/164063684597\/s","isImage":true,"ext":"jpg"},{"id":"164063686573","name":"164063686573.jpg","caption":"","url":"https:\/\/it.model-boats.com\/media\/164063686573\/l","thumbUrl":"https:\/\/it.model-boats.com\/media\/164063686573\/s","isImage":true,"ext":"jpg"},{"id":"164063688936","name":"164063688936.jpg","caption":"","url":"https:\/\/it.model-boats.com\/media\/164063688936\/l","thumbUrl":"https:\/\/it.model-boats.com\/media\/164063688936\/s","isImage":true,"ext":"jpg"}]
First photo shows the hand rail. Having brass wire and tubing inhouse built the rail. Formed the rail and cut two pieces for the angled pieces. Cut two tubes to fit over the wire filed a hole in the tube for the down pieces to fit into. Silver soldered the down pieces in place. Fine tune when installing.
My first upper structure was off a little sitting on the boat decided to make the structure again. The windows where cut down to 5 from 7 .
Rick
[{"id":"164097184357","name":"164097184357.jpg","caption":"","url":"https:\/\/it.model-boats.com\/media\/164097184357\/l","thumbUrl":"https:\/\/it.model-boats.com\/media\/164097184357\/s","isImage":true,"ext":"jpg"},{"id":"164097186953","name":"164097186953.jpg","caption":"","url":"https:\/\/it.model-boats.com\/media\/164097186953\/l","thumbUrl":"https:\/\/it.model-boats.com\/media\/164097186953\/s","isImage":true,"ext":"jpg"},{"id":"164097188951","name":"164097188951.jpg","caption":"","url":"https:\/\/it.model-boats.com\/media\/164097188951\/l","thumbUrl":"https:\/\/it.model-boats.com\/media\/164097188951\/s","isImage":true,"ext":"jpg"},{"id":"164097190724","name":"164097190724.jpg","caption":"","url":"https:\/\/it.model-boats.com\/media\/164097190724\/l","thumbUrl":"https:\/\/it.model-boats.com\/media\/164097190724\/s","isImage":true,"ext":"jpg"},{"id":"164097192870","name":"164097192870.jpg","caption":"","url":"https:\/\/it.model-boats.com\/media\/164097192870\/l","thumbUrl":"https:\/\/it.model-boats.com\/media\/164097192870\/s","isImage":true,"ext":"jpg"}]
First photo shows the hand rail. Having brass wire and tubing inhouse built the rail. Formed the rail and cut two pieces for the angled pieces. Cut two tubes to fit over the wire filed a hole in the tube for the down pieces to fit into. Silver soldered the down pieces in place. Fine tune when installing.
My first upper structure was off a little sitting on the boat decided to make the structure again. The windows where cut down to 5 from 7 .
Rick
Decided to re-make the wind screen. This one from wood. Both designs showing Wood and Styrene. Mahogany rub rail as I plan to do the deck in Mahogany. Chines are in along with bottom rails.
Rick
[{"id":"164124357049","name":"164124357049.jpg","caption":"","url":"https:\/\/it.model-boats.com\/media\/164124357049\/l","thumbUrl":"https:\/\/it.model-boats.com\/media\/164124357049\/s","isImage":true,"ext":"jpg"},{"id":"164124359160","name":"164124359160.jpg","caption":"","url":"https:\/\/it.model-boats.com\/media\/164124359160\/l","thumbUrl":"https:\/\/it.model-boats.com\/media\/164124359160\/s","isImage":true,"ext":"jpg"},{"id":"164124361762","name":"164124361762.jpg","caption":"","url":"https:\/\/it.model-boats.com\/media\/164124361762\/l","thumbUrl":"https:\/\/it.model-boats.com\/media\/164124361762\/s","isImage":true,"ext":"jpg"},{"id":"164124363625","name":"164124363625.jpg","caption":"","url":"https:\/\/it.model-boats.com\/media\/164124363625\/l","thumbUrl":"https:\/\/it.model-boats.com\/media\/164124363625\/s","isImage":true,"ext":"jpg"}]
Decided to re-make the wind screen. This one from wood. Both designs showing Wood and Styrene. Mahogany rub rail as I plan to do the deck in Mahogany. Chines are in along with bottom rails.
Rick
Assistenza Model Boats Website con un abbonamento e sblocca nessuna pubblicità, download di immagini, puzzle passati e altro — a partire da poche sterline al mese.